HOW TO Brush embroidered love heart cookies
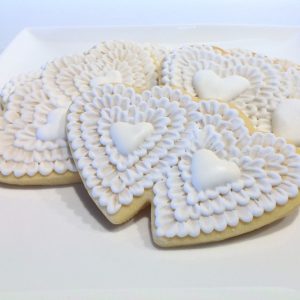
What a wonderful creation for wedding favours, christenings or just to impress!
I hope you all try it once you see how easy it is and I’d love you to post your creations on my FB page too 🙂 The result may look like ‘rocket science’, but it is clever and simple…I just had a play and I hope you do too. In no means is it perfect, but as a whole, the look of these biscuits is very effective and as I always say, practice makes perfect confidence.
Depending on your recipe, you will need about ‘outlining’ piping consistency royal icing (RI), paint brush, blotting cloth (I used paper towel) and a bit of water..that’s it ! See Royal Icing recipe here.
You want your RI ‘drop’ to hold it’s own shape to what you have piped, you do not want it to spread into a blob (too thin) and you do not want it to spiral out of your tip (too thick)
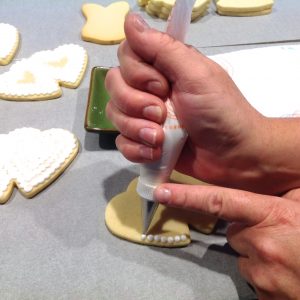
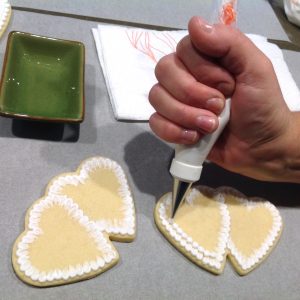
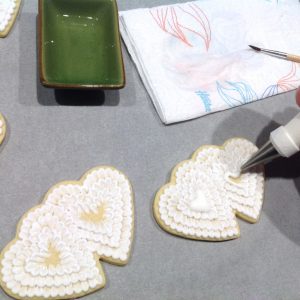
STEP 1 – Fill you piping bag with ‘outline’ consistency RI in your desired colour. In a row along the outline of your cookie, add some dots, as big or small as you like or as close or as far apart you like. It all depends on the look you are going for and also the size of your biscuit to look proportionate. Working on a few in a row, working swiftly ensures the dots do not crust over as it will not look right.
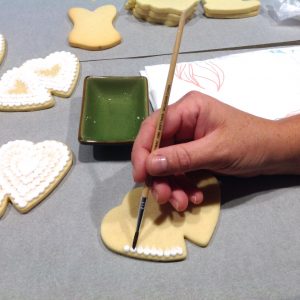
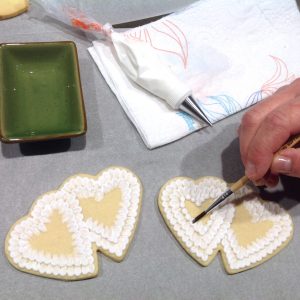
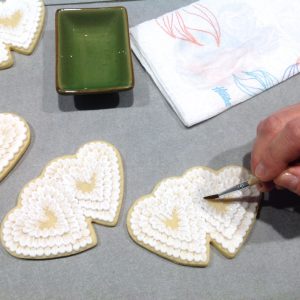
STEP 2 – Dampen your paint brush and blot it on your paper towel, ensuring that there is no excess water in your brush. Placing the tip of your brush in the middle of each RI dot, and simply drag the RI out (to look almost like an oval now, I guess) Stop at the same point for every dot, so you have a clean row of ‘ovals’.
You can start with pointed bristles if you like and keep it thin or you can fan the bristles out a little as you drag. Again, no way is right or wrong, it is just the look you are going for. A little of the biscuit may show through, but this is a gorgeous look, especially when you combine the next row etc.
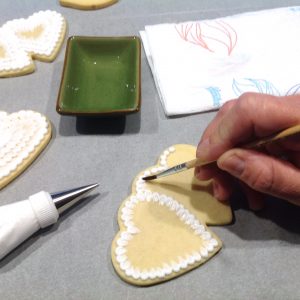
STEP 3 – Continue all the way around your cookie repeating the same method following the outline shape of your cookie, until you have a complete outline made. Each time you add your RI dots, clean and re blot your brush, to keep it free of any crusted RI. If you work quick enough, you may be able to add a few more than I have in the picture. You will be able to judge this as you begin.
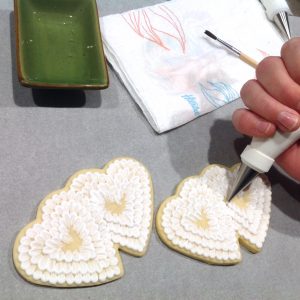
STEP 4 – To add your next row of RI dots, choose the position. If you want multiple layers without much of the ‘tear drop’ showing, then add the dots closer. I chose to have most of it showing to give that real embroidery effect. So each of my dots were http://www.pythagorasandthat.co.uk/buy-zithromax just overlapping the base of the previous row. You can either place them in between the dots in the first row or directly beneath them, just do not have to much biscuit showing through as it then can look ‘sparse’. Repeat the process.
I generally work on a few cookies in a process line, so the first embroidered row has time to dry a little and not mix with the next row by chance. If you are choosing to work with multiple colour rows, I would allow to dry completely before adding the next colour, to avoid any colour bleed.
STEP 5 – Continue working on a couple of biscuits at a time, adding a 3rd row exactly the same way as the previous steps. By this time, you will be getting pretty quick, piping, cleaning, blotting and dragging, so you may find you are adding more dots at a time. For this size biscuit I chose to do 3 layers of embroidery. This shape cookie cutter is available for purchase.
STEP 6 – If you are using our handmade twin heart cookie cutter, you may need to add this step. Add a few smaller dots of RI just to complete you underlapped heart, so as when you add the centre heart, it will not have biscuit showing. You may not need to do this, but you can see I did, to have a complete heart look.
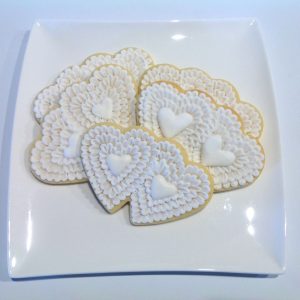
STEP 7 – Using flooding consistency RI, pipe a heart in the middle to finish off. You may try to use your outline consistency RI, but you may find it may not settle nicely without and peaks or lumps. You can certainly outline the love heart with your outline consistency, but add a couple of drops of water and thin it a little to flood it. Gently tap your cookie to ensure all air bubbles have risen to the surface. Pop any with a toothpick. Also, flood it so the heart looks plump. It almost feels like you’ve added too much, but this will avoid craters forming, or dips in the RI.
I found adding a solid heart in the middle finished it off beautifully. If you choose to add a different colour heart in the centre, then allow your cookies to dry completely overnight so as the colour does not bleed. Personally, I am loving the all over same colour, it has a certain ‘opulence’ about it.
A different, effective way would be to flood your cookie one colour, allow to dry overnight and then add this technique in another colour on top ..Gorgeous!!
I do hope you have enjoyed reading and learning this embroidered technique…and try it for yourself. They certainly give a certain feel about them and I’m sure people will say ‘they look too good to eat’. This technique really can be used on any of our shapes, there is no limit to your imagination.
I look forward to seeing your creations. If you have any questions, feel free to contact me direct anytime.

