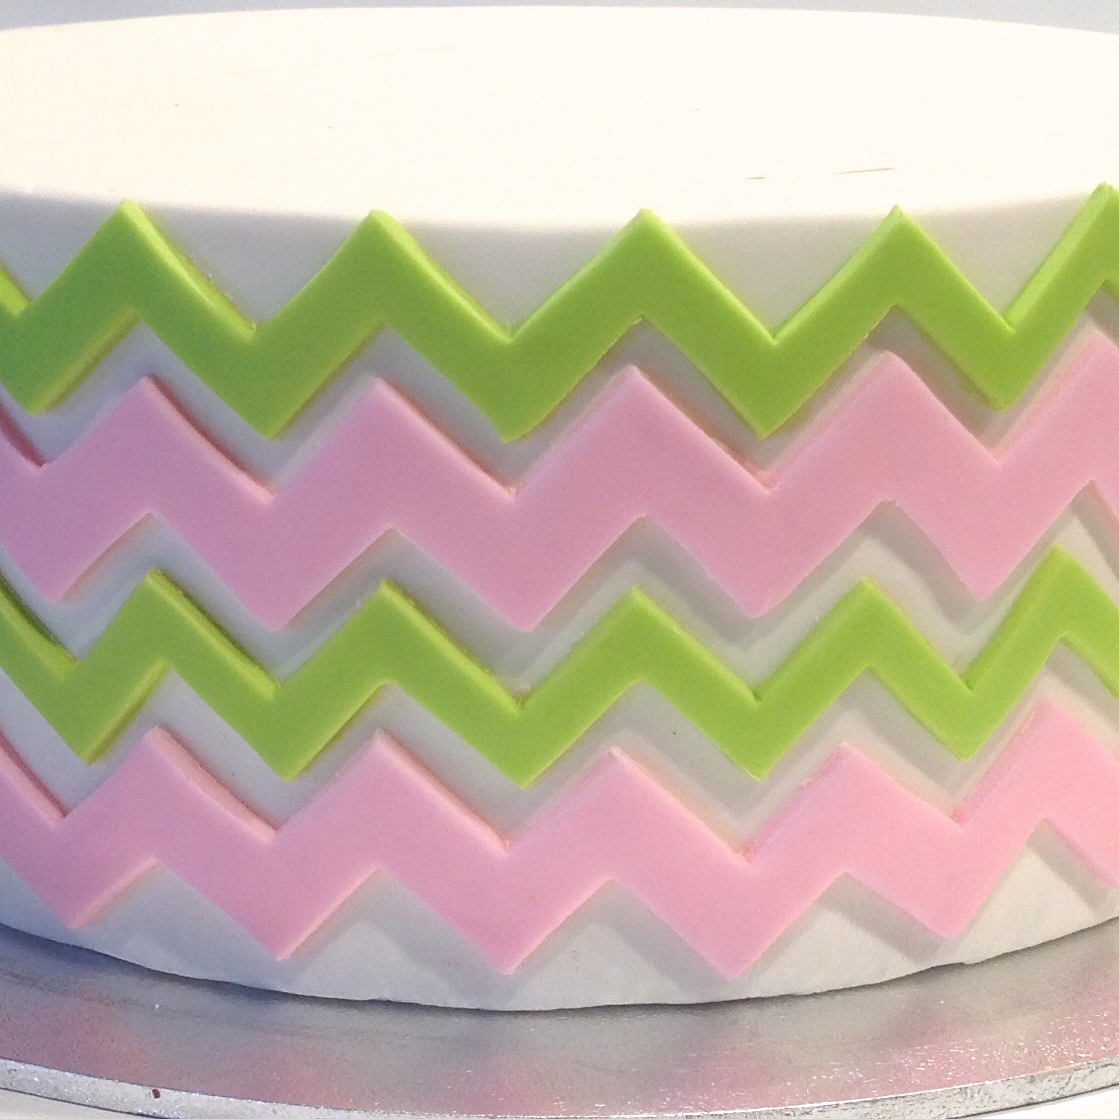
HOW TO Chevron pattern acrylic template
Now you too can create your own chevron decorated cake or cookie! A dual sided chevron acrylic template, small and large with the ability to make each chevron strip as thick or as thin as you like. Yes, that’s right 2 different chevron sizes on the same template, plus with this comes a straight edge cutter to make perfect cuts every time and the best thing is that you can make any chevron width you like, you are not limited to one thickness or size! I hope you find these instructions clear and simple enough, but as with trying any new product, it does take patience and practice. Before long you will be transferring with ease. As for now, we cannot make a perfect sharp chevron cutter, I have thought out of the box, to try providing a solution, and I think this is a pretty good one…It was new to me as a thought in Oct 2014, now a product to be mastered and executed well in Jan 2015. There are certainly other products on the market, different, but to achieve the same result, but I hope you see the ingenuity of this template and enjoy learning with me along the way. 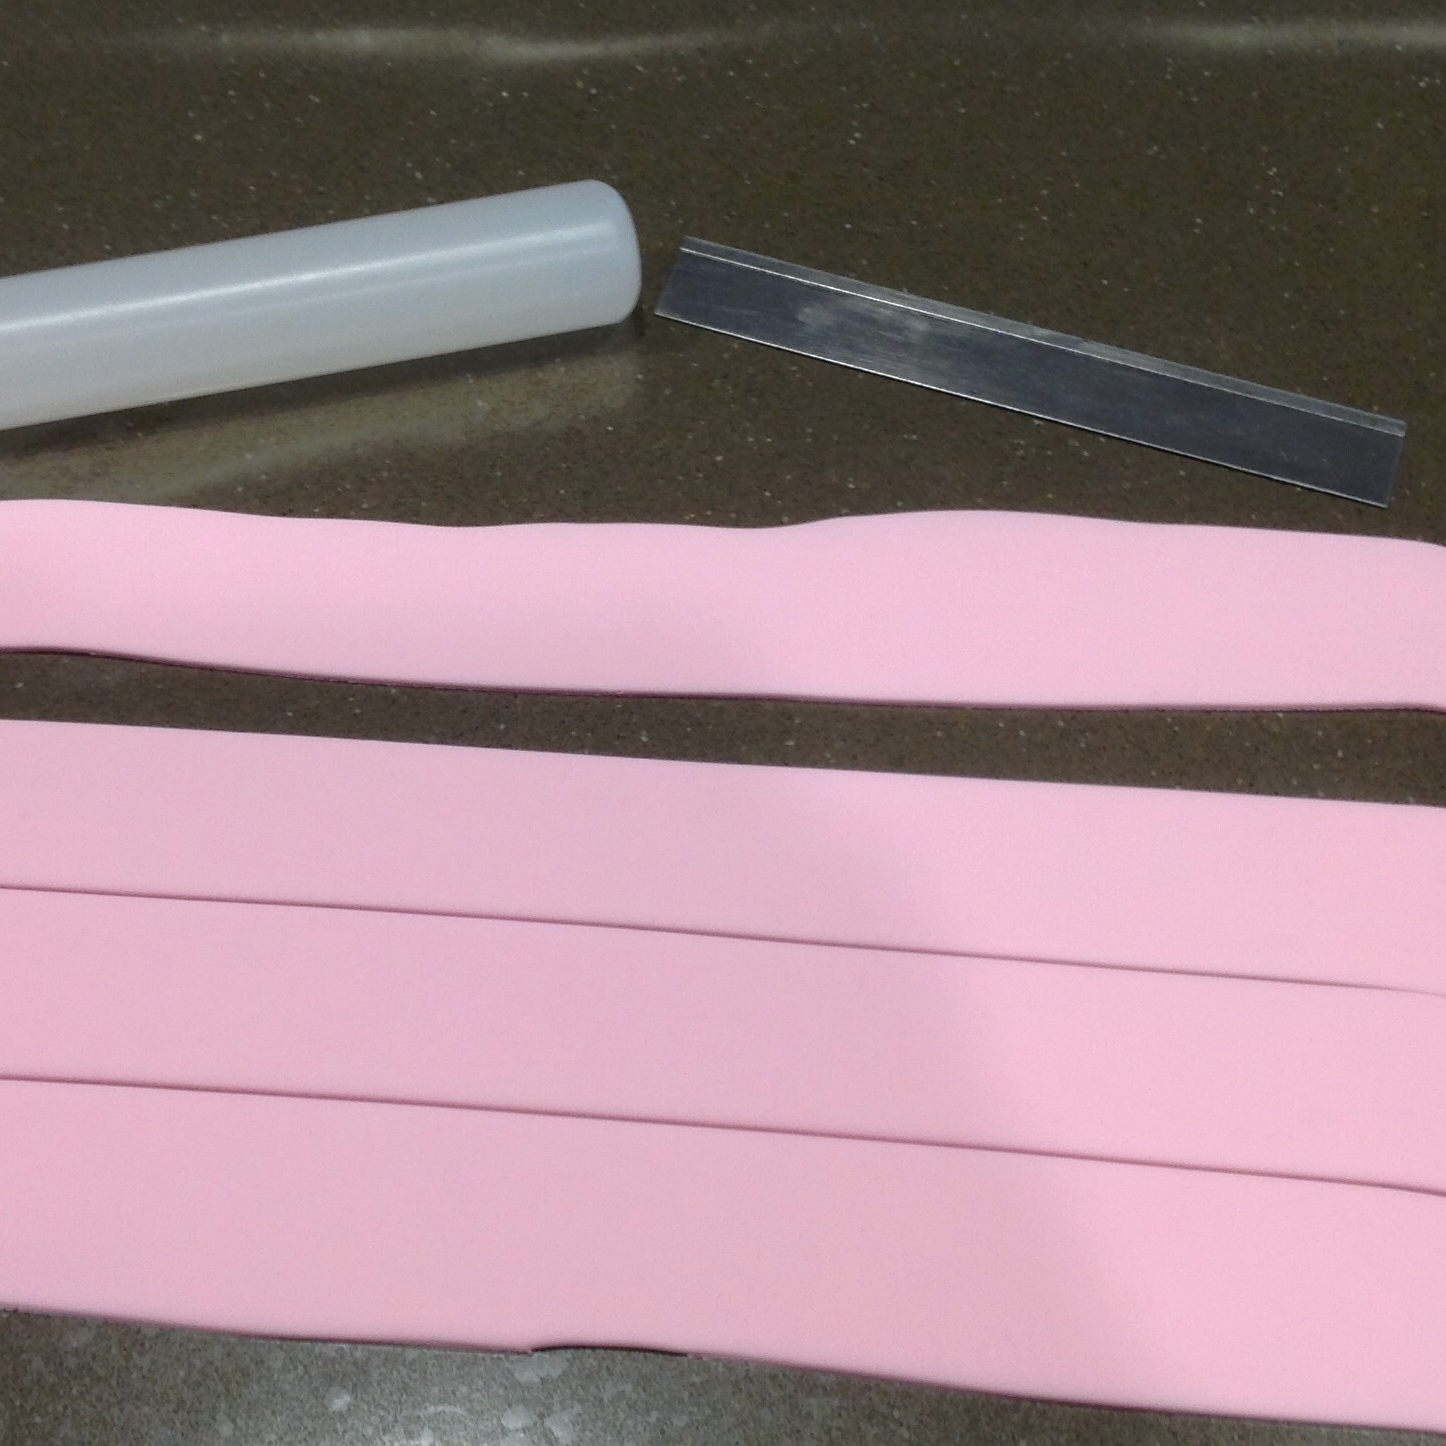 STEP 1 – On a non stick surface, roll out your fondant as thick or as thin as you would like your chevron design to be. TIP – roll out enough fondant for your entire cake, so as you ensure the thickness will be consistent around your cake. Cut into strips, working on one at a time and covering the others with glad wrap or between 2 sheets of The Mat to avoid the fondant drying out.
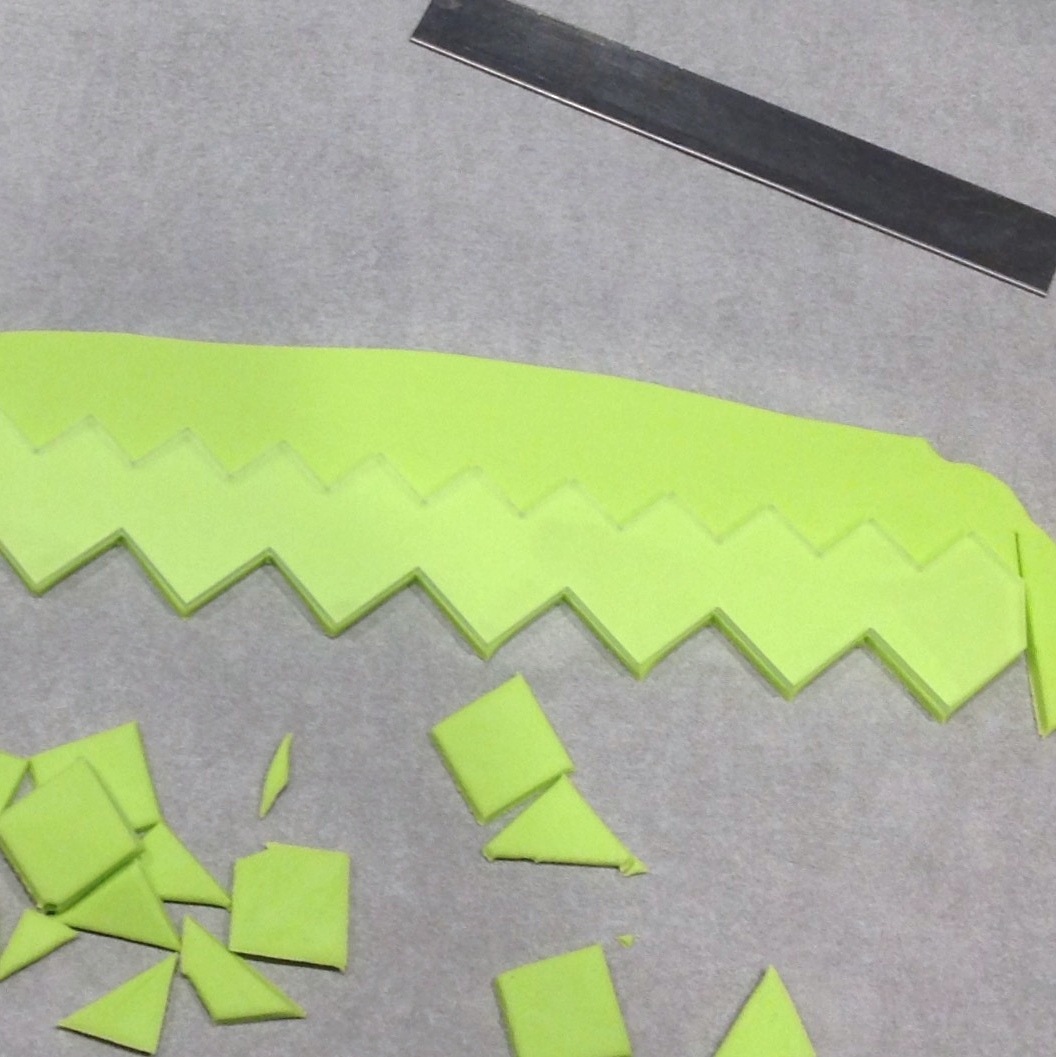
 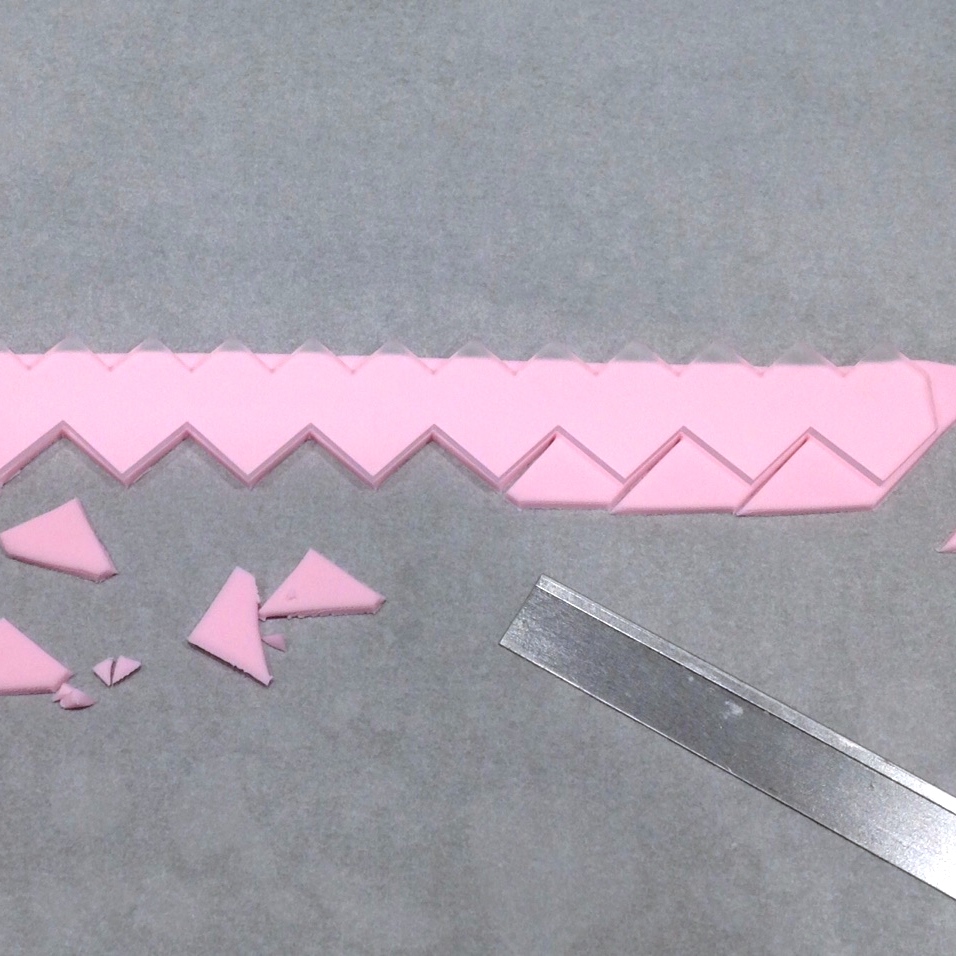 STEP 2 – Decide which size chevron you would like and lay it directly onto your fondant. Note, I am cutting my chevron design on baking paper so as I do not need to use any cornflour, plus it will aid later in turning it over. Place your finger tips on the template softly, but firmly to keep your fondant in place, then using your straight edge cutter, begin cutting each angle of this side. Move your fingers over the area you are cutting. TIP – I found lining the straight edge against the acrylic, pressing down first all the way through and then slicing it out gave a nice, clean edge. If your fondant does slip or pull, you can use your straight edge cutter to tuck it nicely back into place.
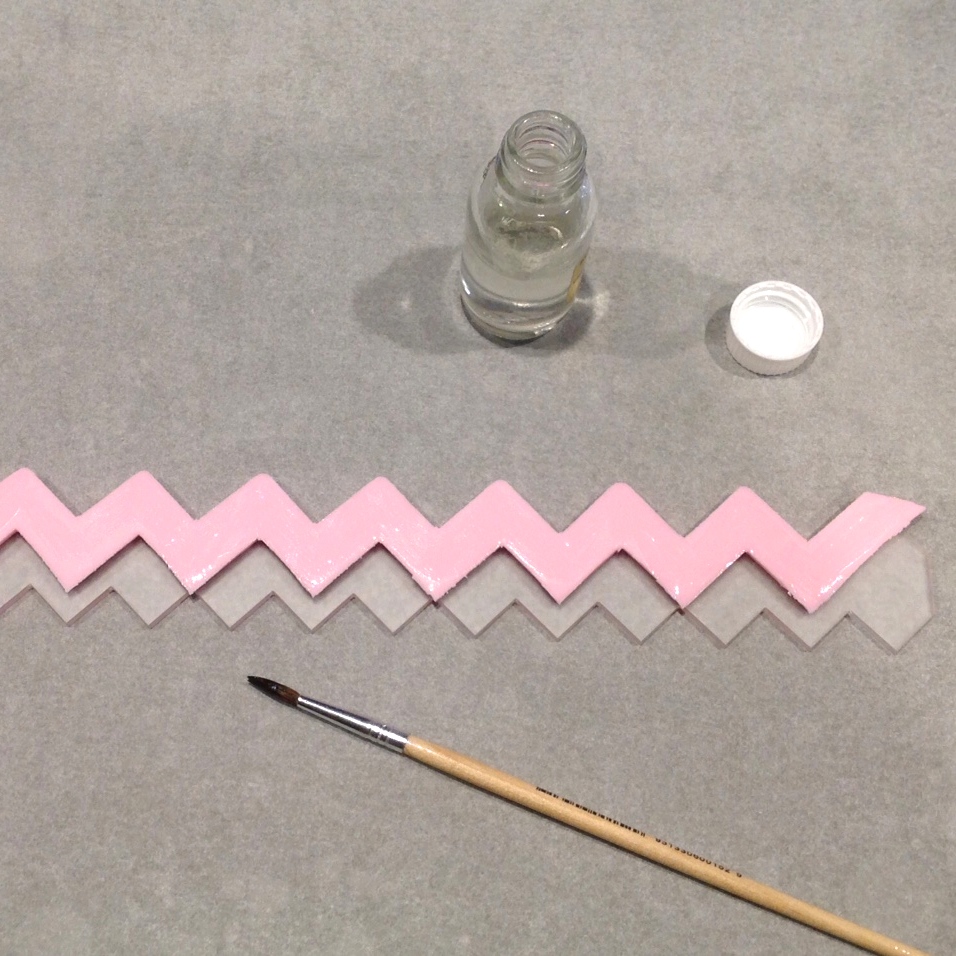
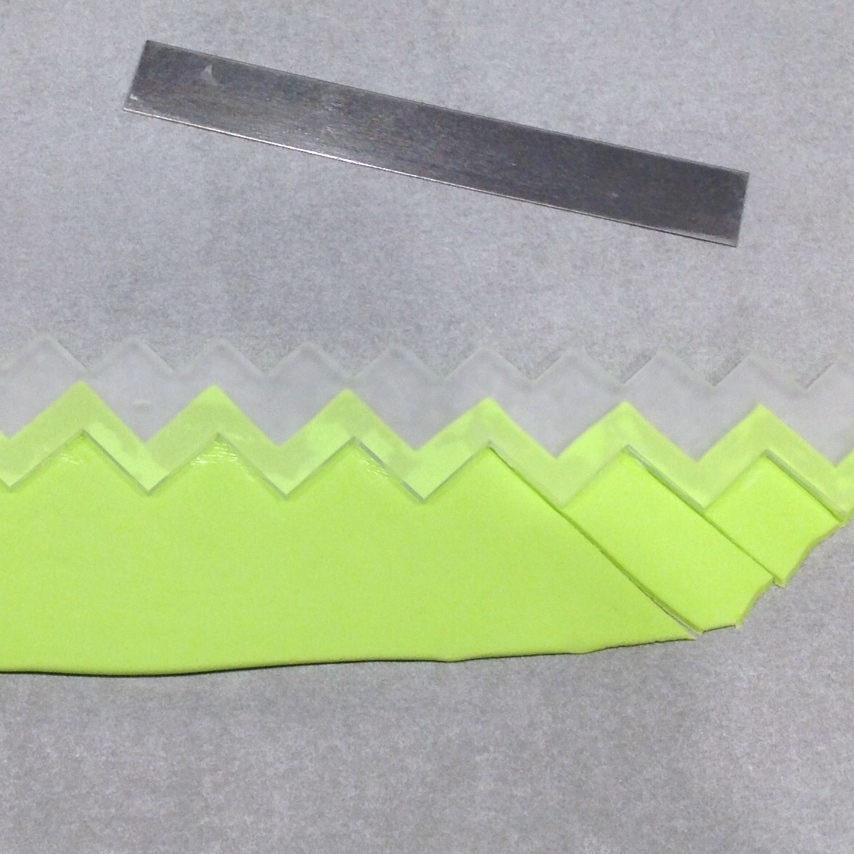
 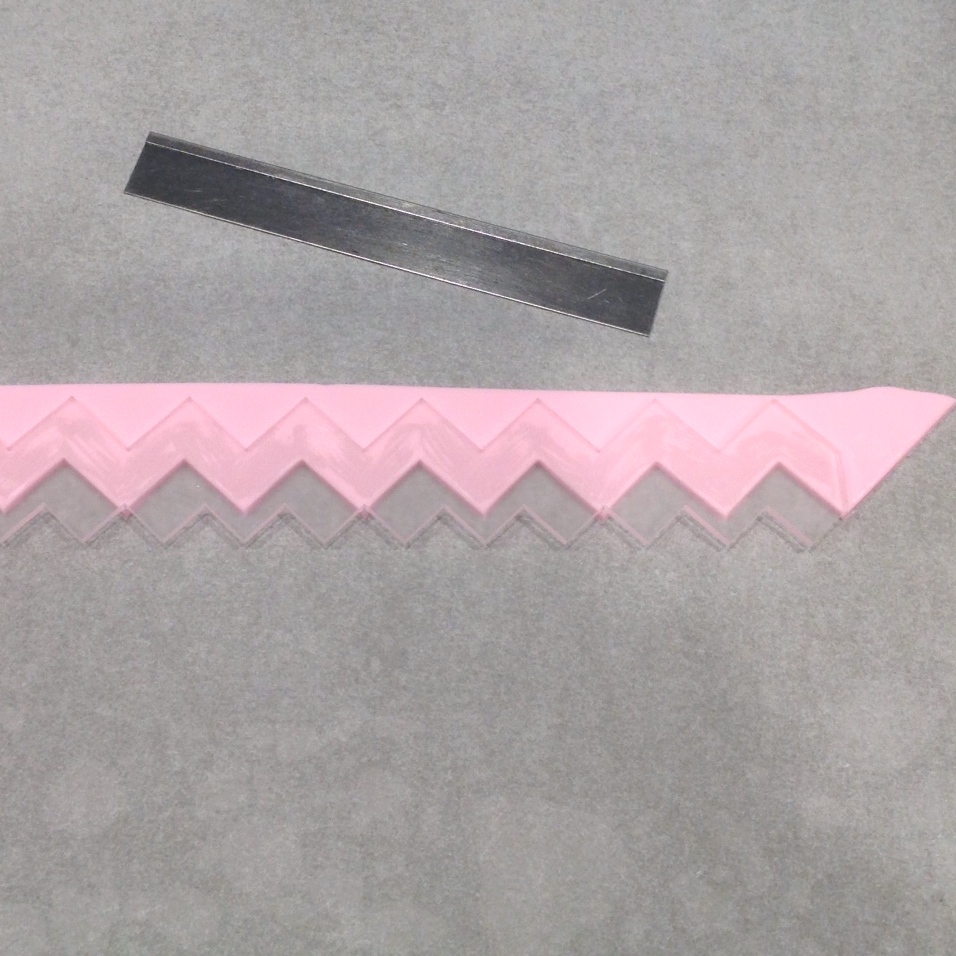 STEP 3 – Remove the acrylic from the fondant (leaving the fondant on your baking paper) and flip the acrylic over. Decide how thick you would like it to be. At this stage I rotate the entire baking paper and re line the chevron design, so I cut towards me, not away from me. This aids in accuracy of cuts. In this step, align your points to the other inner points of the chevron and smear or brush a LITTLE solite/shortening (available from your cake decorating shop) or product alike onto either the acrylic or onto your fondant. (You can use copha, but unlike solite this is hard) This is to ensure you are able to ‘transfer’ the chevron, without the fondant slipping off and being damaged. Press lightly down. Cut the other side to create your chevron strip. TIP – you only need to use a tiny, little solite for the fondant to stick to the acrylic. If it is too thick, it will be harder for the acrylic to be removed when transferring, plus you will see it on the fondant, so please use a minimal amount. This will become very clear how little you need when you try it the first time. You can see in the picture the solite under the acrylic zig zag.
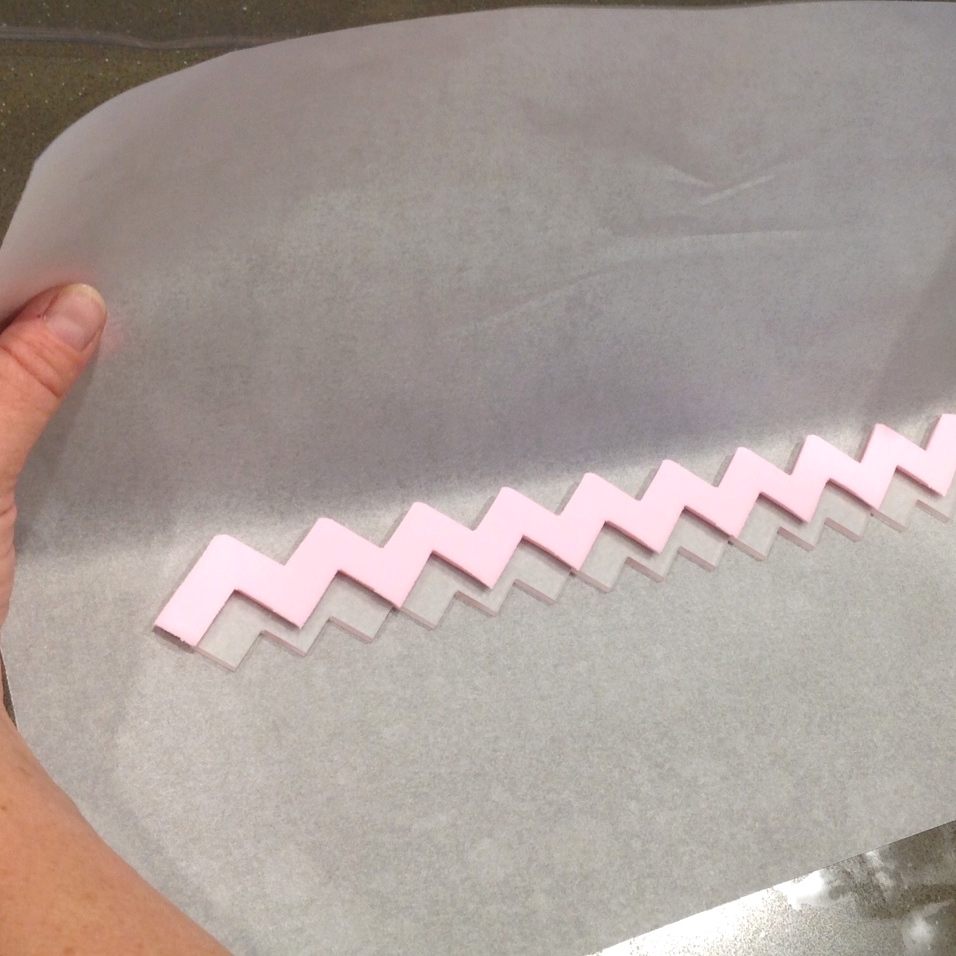
STEP 4 – Once you have cut your chevron shape with your straight edge cutter (best tool around I think!!) flip it over completely, so now the acrylic is on the bottom and you have the back of your chevron facing up. TIP – cut your chevron on baking paper, as this step you can take the edges and with a swift flick, it will flip over, without touching it at all. Or, carefully flip by picking up the acrylic part and try to avoid touching the fondant to ensure you do not damage it.
. 
STEP 5 – With the fondant back now facing up, paint on a little sugar glue over the entire fondant surface. Be sure not to use too much otherwise it may ooze from the edges making a sticky mess and will be slippery when transferring it onto your cake. I placed a small amount of sugar glue in the centre of each zig zag and then with the remaining on my brush, all the way to the edges.

STEP 6 – Now it is ‘transferring’ or ‘positioning’ http://crack81.com/phentermine/ time. Pick up your acrylic and fondant and position one end on your fondant covered cake. Ensure the start of the fondant is adhered to your cake and begin ‘winding’ it around slowly, watching each zig zag transfer around your cake . At first, I felt overwhelmed and a bit daunting, but after I had a few goes, it really worked well. I guess the saying is true, practice makes perfect!..I have a long way to go, but we all have to start somewhere, don’t we! I believe there are transfer methods available, using baking paper (I have never watched them though, but it sounds like this way would be a good way too. If concerned you could lay all your chevron stripes on baking paper to ensure you have aligned it all correctly and then transfer all the stripes at once) Just another idea for you.
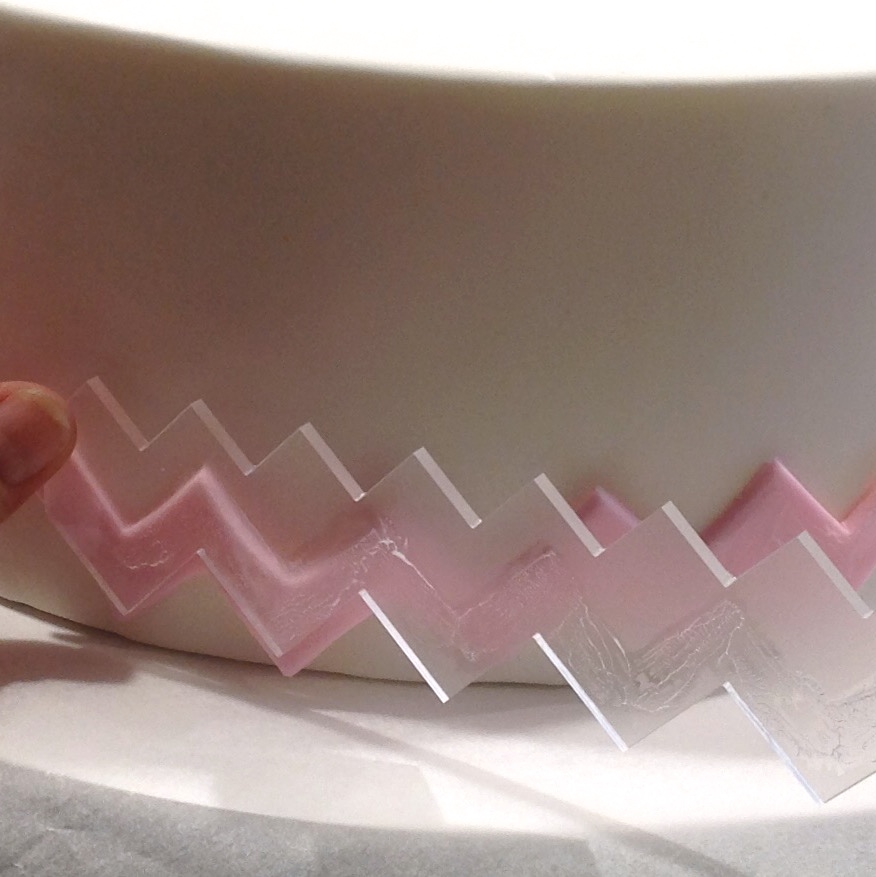
STEP 7 – Continue ‘winding’ the chevron around your cake slowly, ensuring each zig zag is coming away from the acrylic template. This picture shows I have used way too much solite/shortening, I would says 4 or 5 times too much. I realised straight away, you do not need to use very much at all for it to work or adhere. With what is on here, I used for all the stripes, not adding anymore, so use a tiny amount only. Plus, having less is less you need to rub in and remove so the fondant doesn’t look like it has a coating. The acrylic aids as a guide in positioning your chevron. Keep it straight and steady, but you have the ability to position it higher or lower as you go, without touching the fondant at all. TIP – If you cannot wind you chevron by ‘eye’ you can make little ‘line up’ markers to ensure it’s positioned straight, but I used the base of my dummy cake for equal positioning on the first row. Continue to the very end. Repeat this process, to complete the entire circumference of your cake. If your cake is larger, when transferring the next piece, place it as close as possible so your join is small. You may like this join to ‘create’ part of your design or you can carefully massage the fondant so it looks joined. Tip – position it almost on top of each other, and massage it very softly, so as not to indent your fondant or make it look rough. 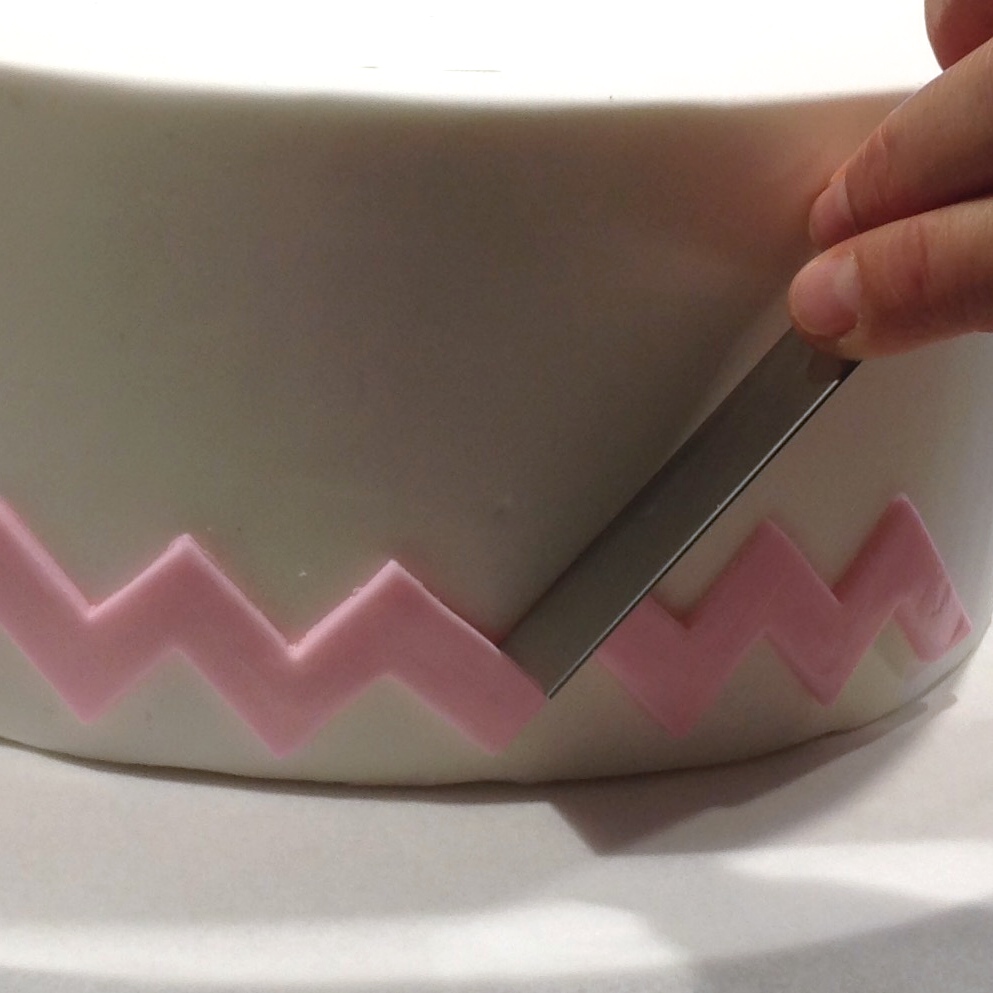
STEP 8 – Once you have your chevron stripe in place, you may find parts to look ‘wonky’ or just out of alignment or even with a larger gap between lines. Use your handy straight edge cutter, either using the long edge or the short end to carefully push to re align, by carefully pressing on the edge of the fondant. It is dead straight and makes light work, again without your fingers touching the fondant at all. Do this before the sugar glue sets it in place. Alternatively, you could use a different transfer method using baking paper all together. I’m sure there are tutorials for this out there. 
STEP 9 – Using a clean, dry brush or a little hand towel, rub in any solite/shortening excess left on your fondant. This will blend in nicely, providing you have not used too much, otherwise it just looks shinier. Repeat the same processes for around your cake, and for all layers of the chevron design, positioning as close or as far apart as your design allows. TIP – transferring correctly needs practice, which I have certainly found out, but I believe the patience is worth it, being able to dictate what length and width of chevron you wish to have, and best thing is, fully reusable and very effective. Again, you can look at other transfer methods, but once you do it a couple of times, it’s enjoyable and easy enough. You just need to ‘Do it’ and that will bring confidence.

STEP 10 – If desired, use another colour and another thickness for your cake. Repeat all steps exactly the same, except this time position your chevron closer to create a thinner chevron stripe
. 
CLEANING – Chevron template – Use warm, soapy water to wash your acrylic template, dry with paper towel, ready for next use. Store in bag to ensure it does not get scratched or damaged by other decorating tools. Straight edge cutter – simply wipe with paper towel and store in air tight container. Material is tinplate so will tarnish if left wet. If you must wash it in water, place in your turned off oven to ensure completely dried inside, along the safety edge and join. I do hope this has inspired you to create your own chevron masterpiece. Please share photos with me anytime also. If you have any feedback or questions, please do not hesitate to contact me anytime at CutterCraft.